What the electronics soldering setup includes
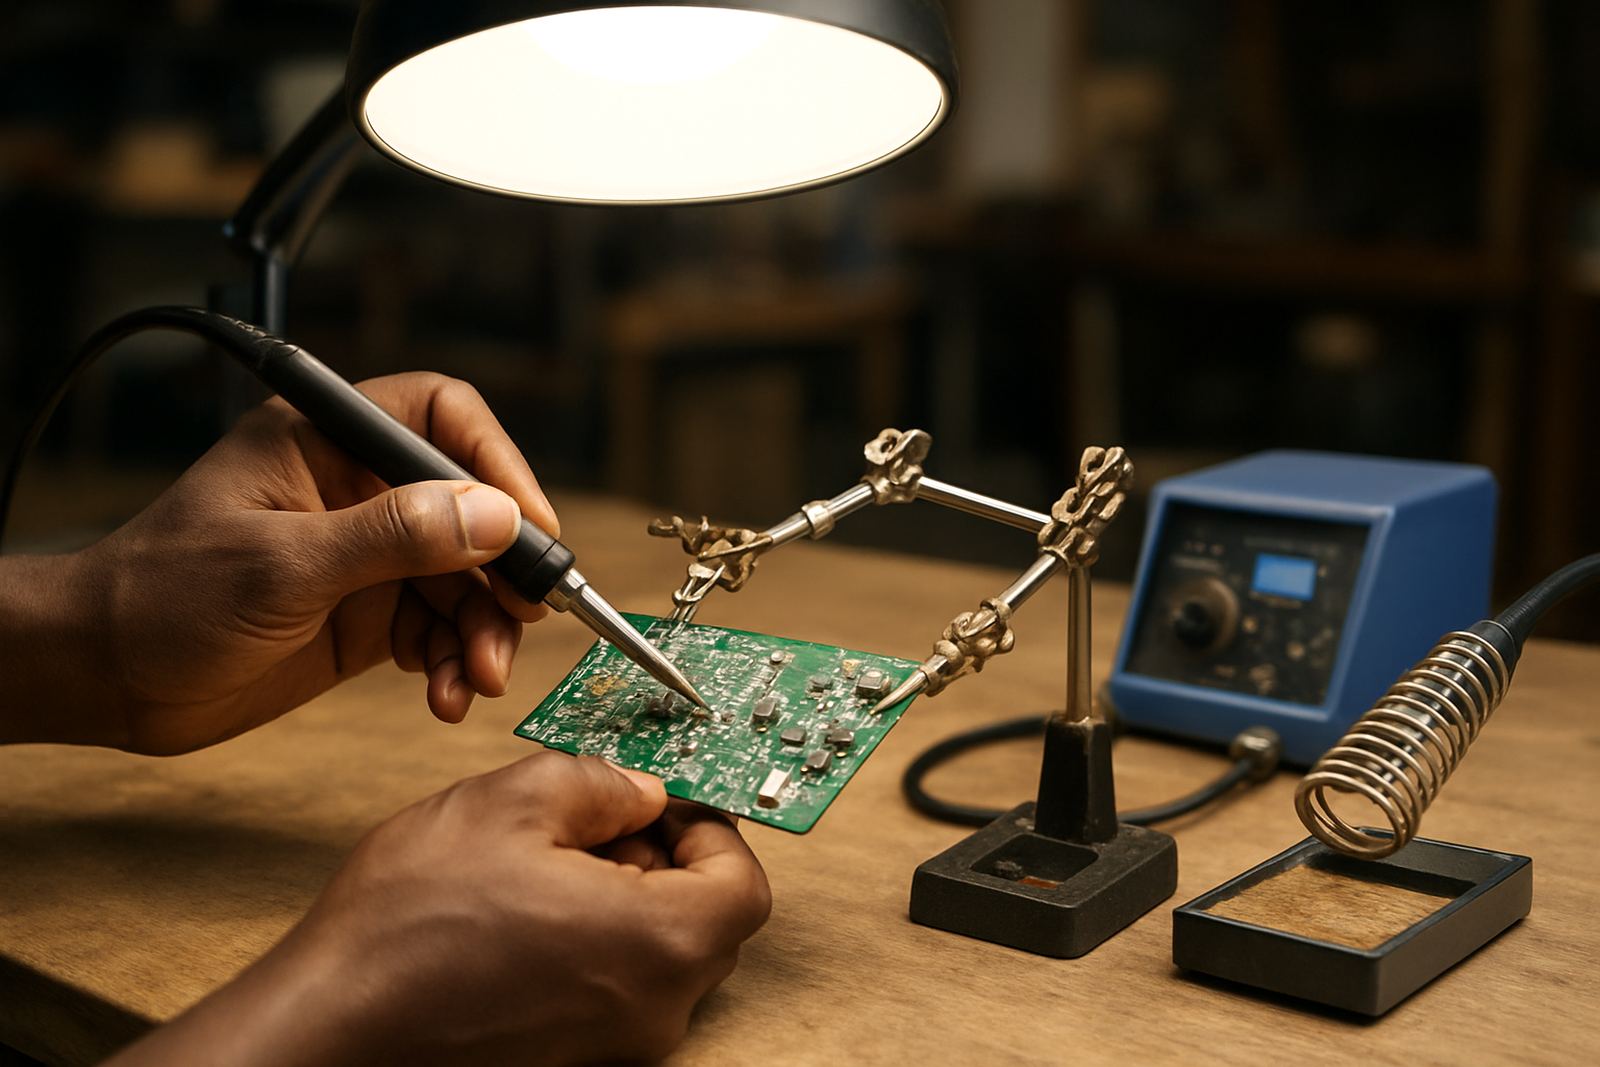
Electronics soldering is the part of making where small components are fixed onto a circuit board or wired neatly into a project. The setup is aimed at clean joins, correct heat control, and a working bench that helps new users learn the right order of steps without burning pads or lifting tracks.
Typical kits and bench packs include a temperature-controlled soldering iron, stand, brass tip cleaner, solder wire, flux, tweezers, side cutters, helping hands, and a small extraction fan for indoor use. For training groups, we also plan the bench layout so tools stay within reach and learners do not crowd the heat zone.
- Temperature range: 200°C to 480°C
- Tip style: fine conical, bevel, and small chisel options
- Power input: 220V to 240V AC
- Bench use: 1 to 4 users per station depending on table width
Who it suits in Johannesburg and beyond
This product works well for maker hubs in Braamfontein, training rooms in Sandton, school labs in Pretoria East, and community spaces in Soweto or Midrand that run electronics clubs or repair sessions. It also suits partner venues in Durban, Cape Town, and Gqeberha where humidity and salt air can affect stored tools if they are left open or uncleaned.
For first-time makers, the setup supports simple circuit assembly, component identification, LED projects, battery holders, switch wiring, and basic troubleshooting. For more advanced groups, it can be used for sensor boards, small audio builds, and repair practice on leads, headers, and connectors. The same bench can also be adapted for facilitator-led demos and school holiday workshops.
Bench sizes and option choices
We supply electronics soldering in a few practical layouts so the kit matches the room size and the number of users. A compact bench keeps things tight for small training rooms, while a shared station works better when several learners need space for component trays, notes, and testing.
- Starter bench: 1 iron, 1 stand, 1 extraction fan, basic hand tools
- Training bench: 2 to 4 irons, shared cleaning station, organiser trays, safety signage
- School lab pack: extra spare tips, component storage, labelled bins, facilitator tools
- Maker station add-on: multimeter, magnifier, wire strippers, test leads, heat-shrink kit
When ordering, it helps to know your table length in metres, whether the room is fixed or mobile, and how many learners will work at the same time. If power points are limited, we can plan the station so extension leads are kept short and tidy, which helps in load-shedding conditions too.
Power, ventilation, and safe installation
Electronics soldering needs standard mains power and enough airflow to keep fumes moving away from the user. A simple extraction fan is usually enough for small benches, while larger rooms should allow for front-to-back airflow or a dedicated fume extraction unit. In a closed room, especially during winter or load-shedding when windows stay shut, the air can become uncomfortable very quickly.
Installation usually means placing the iron stand on a heat-resistant surface, keeping solder and flux away from food areas, and marking a no-touch zone around the hot tip. We recommend a clear bench edge, a nearby bin for offcuts, and visible safety signage so new learners know where to sit, where to place tools, and how to cool the iron after use. In schools and public venues, follow the site’s electrical and fire rules before any training starts.
- Minimum bench depth: 600 mm
- Clear working width per user: 450 mm to 600 mm
- Ventilation: open window, extractor fan, or fume unit
- Surface: heat-resistant mat, metal tray, or sealed laminate top
Care, servicing, and spare parts
A soldering setup lasts longer when the tip is cleaned regularly, the iron is switched off between sessions, and consumables are stored in a dry container. Coastal humidity can cause oxidation on tips and connectors, so it is worth wiping tools before packing them away and keeping silica gel or dry storage nearby where possible.
Routine servicing is simple. Check the cord for wear, test the stand for stability, and make sure the temperature control still heats quickly and holds steady. Replace worn tips before they become pitted, and top up flux, solder wire, and cleaning pads before a class runs out in the middle of a lesson. A small annual check is usually enough for lightly used kits, while busy training rooms may need monthly inspection.
What to check before you order
Before placing an order, confirm the number of users, the level of training, and whether the kit is for daily workshop use or occasional classes. It also helps to know if learners will work on through-hole parts, surface mount parts, or a mix of both, since that changes the tip size and tweezers you will need.
When you send an enquiry through the contact page, include the room location, bench count, and any storage limits. If the venue is in a school, community centre, or shared makerspace, note whether there are rules around smoke extraction, hot tools, or locked storage after hours. That way the pack can match the room instead of arriving with missing pieces or too little support.
- Number of users per session
- Type of circuit work: beginner, repair, or small production
- Available power points and backup power plans
- Storage space for solder, flux, tips, and accessories
- Any rules for ventilation, supervision, or fire safety
Key facts
| Product type | Electronics soldering starter kits, training benches, and workshop support |
|---|---|
| Power requirement | 220V to 240V AC mains power |
| Operating temperature | 200°C to 480°C adjustable range |
| Typical user count | 1 to 4 users per station |
| Suggested bench size | 600 mm depth minimum, 450 mm to 600 mm working width per user |
| Best suited for | Makerspaces, school labs, repair training, and beginner circuit assembly |