What the product photography setup is for
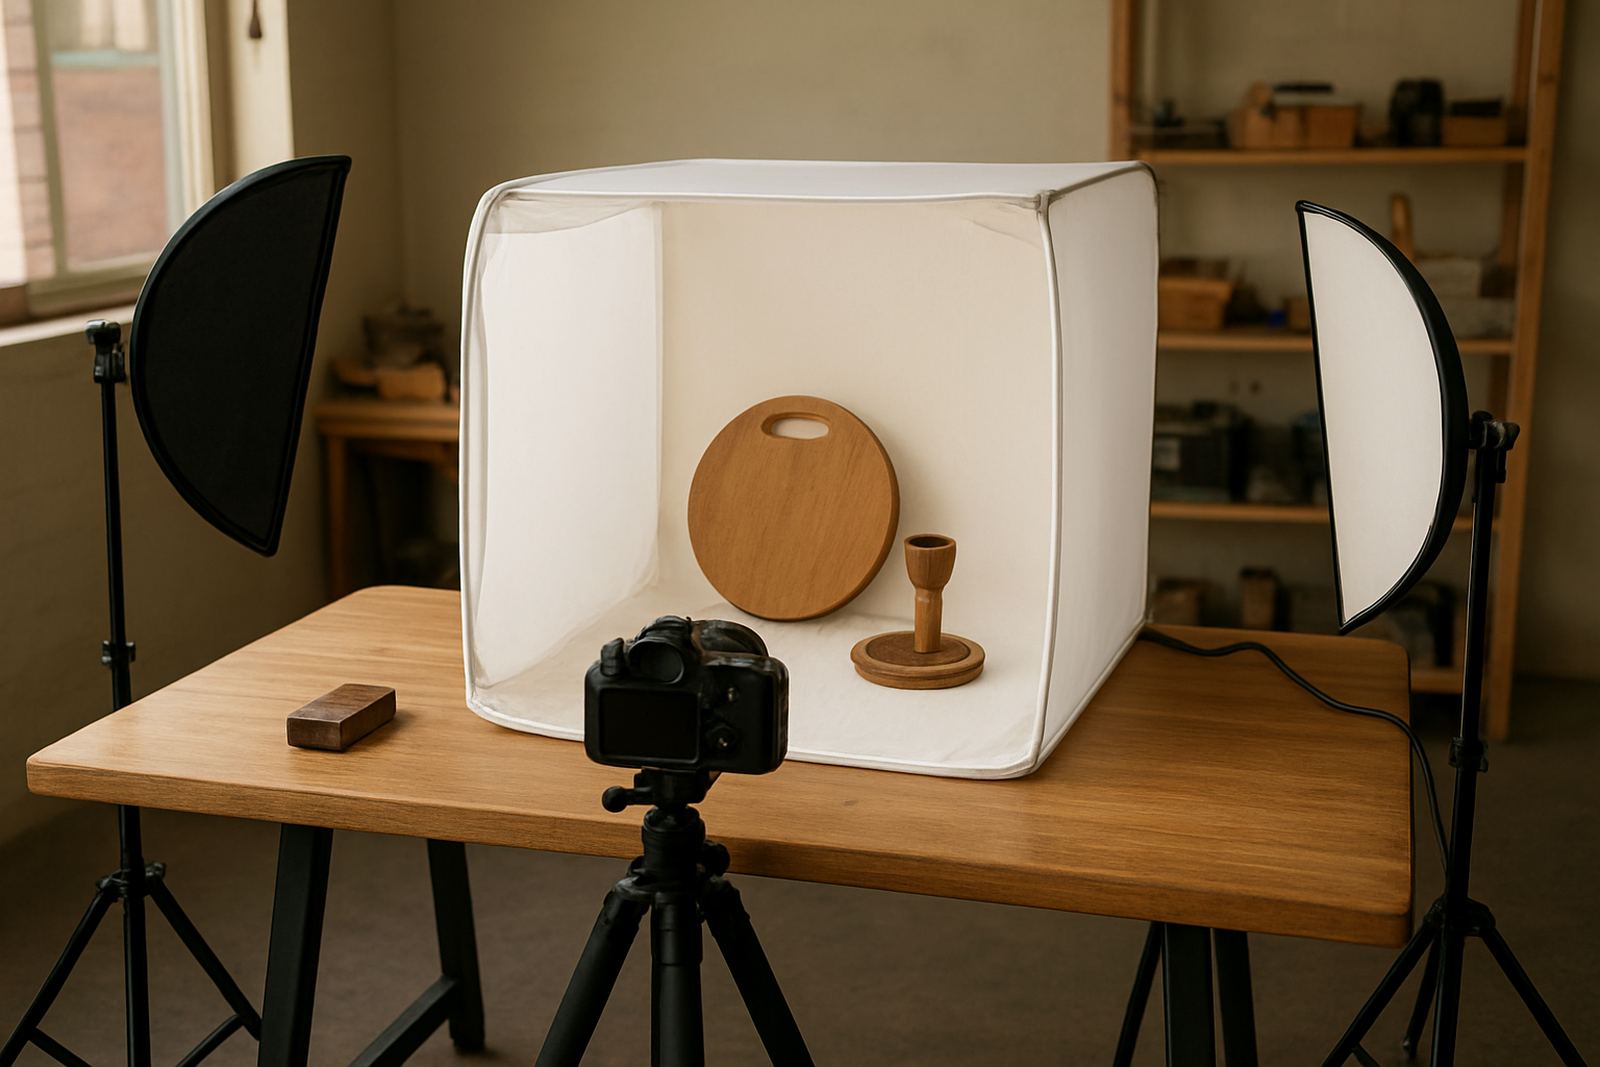
A good product photography setup gives you repeatable images of your work, whether you are shooting a one-off prototype, a batch of handmade items or a full range for a school expo. The aim is simple: keep the light even, reduce shadows and make colours look true so your parts look the same in every photo.
At SA Makers, we specify practical setups for workshops, maker spaces and small studios that need fast turnaround with limited space. That means a clean table area, simple light control and surfaces that can handle sawdust, glue, paint overspray and the odd coffee spill without needing constant fuss.
Sizes and options for different spaces
We plan product photography in a few common formats so it fits a Braamfontein studio, a school lab refresh in Pretoria East or a shared space in Durban. The right size depends on the largest item you need to shoot and how often you will move the setup.
- Compact table setup: about 1.2 m x 0.6 m, ideal for jewellery, small electronics, printed parts and packaged items.
- Medium maker bench setup: about 1.8 m x 0.9 m, suited to product ranges, tools, small furniture components and boxed kits.
- Flexible floor setup: around 2 m x 2 m or larger, useful for bigger builds, display shots and team shoots.
- Portable kit: foldable backdrop, lights and clamps for venues that share space or move between branches.
If your items vary a lot in size, it is usually better to choose a modular layout. That way you can shoot small parts close up in the morning and larger assembled items later without resetting the whole station.
Where it suits best
This setup suits makerspaces, school innovation labs, training venues, retail counters, product startups and workshop teams that need decent images without booking an outside studio. It also works well for municipalities, NPOs and community programmes that document builds, repair work or learner projects.
In coastal areas like Durban and Gqeberha, a simple enclosed storage approach helps protect backdrops, lights and reflectors from moisture and salt air. In inland spaces such as Midrand, Sandton or Soweto, dust control matters more, especially if the photography area sits near a cutting bench or spray area.
- Good for monthly product lists and online catalogues
- Useful for training portfolios and assessment evidence
- Handy for event maker stations and demo days
- Works for school lab refresh projects with limited room
Installation, power and working conditions
Most product photography setups are straightforward to install. A level table, a washable wall or backdrop surface and a nearby power point are usually enough. If you are setting up in a shared venue, allow space for cable runs so people are not stepping over leads during a shoot.
Typical power needs are modest, but you should still plan for load-shedding. A basic setup with LED lights can run from standard mains power and a small backup supply if needed. If the space is used with cutting tools or other heavy equipment, separate the photography station from noisy machinery so vibration and dust do not ruin the shots.
- Allow at least 2 plugs on a dedicated circuit where possible
- Use LED lights to keep heat low and reduce power draw
- Keep the backdrop away from spray paints, grinders and wet prep areas
- Leave a clear walkway for staff, learners and clients
No gas connection is required for the photography setup itself. If the station sits inside a broader workshop, check that any nearby gas bottles, heat tools or paint products are stored according to site rules and municipal safety requirements.
How to care for the kit and keep images consistent
Good care is mostly about cleanliness and consistency. Wipe table surfaces after each session, roll backdrops up flat and store clamps, diffusers and light stands in labelled containers. In humid areas, check metal fittings for light corrosion and keep silica packets in closed storage if the venue tends to get damp.
Replace bulbs or LED panels in matched pairs where possible so the colour stays even across shots. If a backdrop gets stained, replace it before it starts showing in pictures. A lot of teams think the camera is the problem, when it is actually the lighting or the surface that needs attention.
We also recommend a simple monthly check of the stand legs, cable condition and mount points. That takes only a few minutes but it saves time later when a shoot is already booked and the lamp will not sit straight.
What to check before you order
Before placing an order, think about the items you photograph most often and how many people will use the station. A solo maker in Braamfontein has very different needs to a training venue in Cape Town or a school lab in Soweto.
- Largest item size you need to photograph
- Whether you need a fixed station or a portable one
- Available floor space and table height
- Power access and backup during load-shedding
- Storage space for backdrops, lights and accessories
- How often the setup will be shared between teams
If you already have a workshop, we can help you place the photo area so it does not clash with tool traffic, storage shelves or safety signage. That usually means better workflow and fewer broken tripods, which is always worth it.
Support for setup, training and upkeep
SA Makers supports product photography as part of a wider maker environment. Our team can advise on bench layout, consumables planning, member onboarding and facilitator support so the image station is easy to use from day one. We also help with maintenance checks and maker audits where the photo area is one part of a bigger workshop plan.
If you are building a new space or refreshing an old one, we can combine the photo station with storage solutions, safety signage setup and event maker stations. That gives you a cleaner working area and a better result for every build photo, no fuss and no wasted kit.
Key facts
| Recommended footprint | 1.2 m x 0.6 m to 2 m x 2 m, depending on item size |
|---|---|
| Lighting | 2 to 4 LED light sources with diffusers or soft boxes |
| Power need | Standard mains supply, low draw lighting, backup friendly |
| Backdrop options | White, grey or black washable surfaces, roll or panel format |
| Best use | Maker photos, training records, catalogues and online sales images |
| Care interval | Quick clean after each shoot, monthly hardware check |