The brief from a busy Randburg content team
The team came to us with a simple but tight brief: they wanted a compact booth for podcast recordings, voice notes and short interview sessions, all inside a shared office in Randburg. They had a limited floor area, a modest budget, and only a few hours at a time to set up and pack down because the room still had to serve other work during the day.
The booth had to do three things well. First, it needed to reduce echo and outside noise from nearby offices and the passage. Second, it had to be easy to use for different presenters, including first-time guests. Third, it had to fit neatly into the room without blocking access to windows, plug points or air flow. They also asked for a layout that would not need constant maintenance, because the team works with changing schedules and a rotating cast of speakers.
Site checks, measurements and practical limits
We started with a site check and measured the room in detail. The available footprint was 2.4 m by 1.8 m, with a low ceiling and one side close to a glazed partition. That meant we had to plan for sound control without building anything bulky or overly permanent. We also checked the available power points, lighting position and cable routes so the booth would not become a tangle of leads on day one.
Because this was a Johannesburg office, we also kept load-shedding in mind. The client needed a booth that could still function with a backup light and low-power recording setup when the power dropped. We planned for quiet ventilation, clear access to a battery backup pack, and equipment placement that would not need reconfiguration every time the team switched rooms. It was a pratical job, not a showpiece.
- Clear floor space required: 2.1 m by 1.5 m
- Internal booth size: 2.0 m by 1.4 m
- Door opening: 800 mm
- Ceiling treatment height: 2.1 m
- Target occupancy: 2 people for interviews, 1 person for solo recording
What we supplied and built
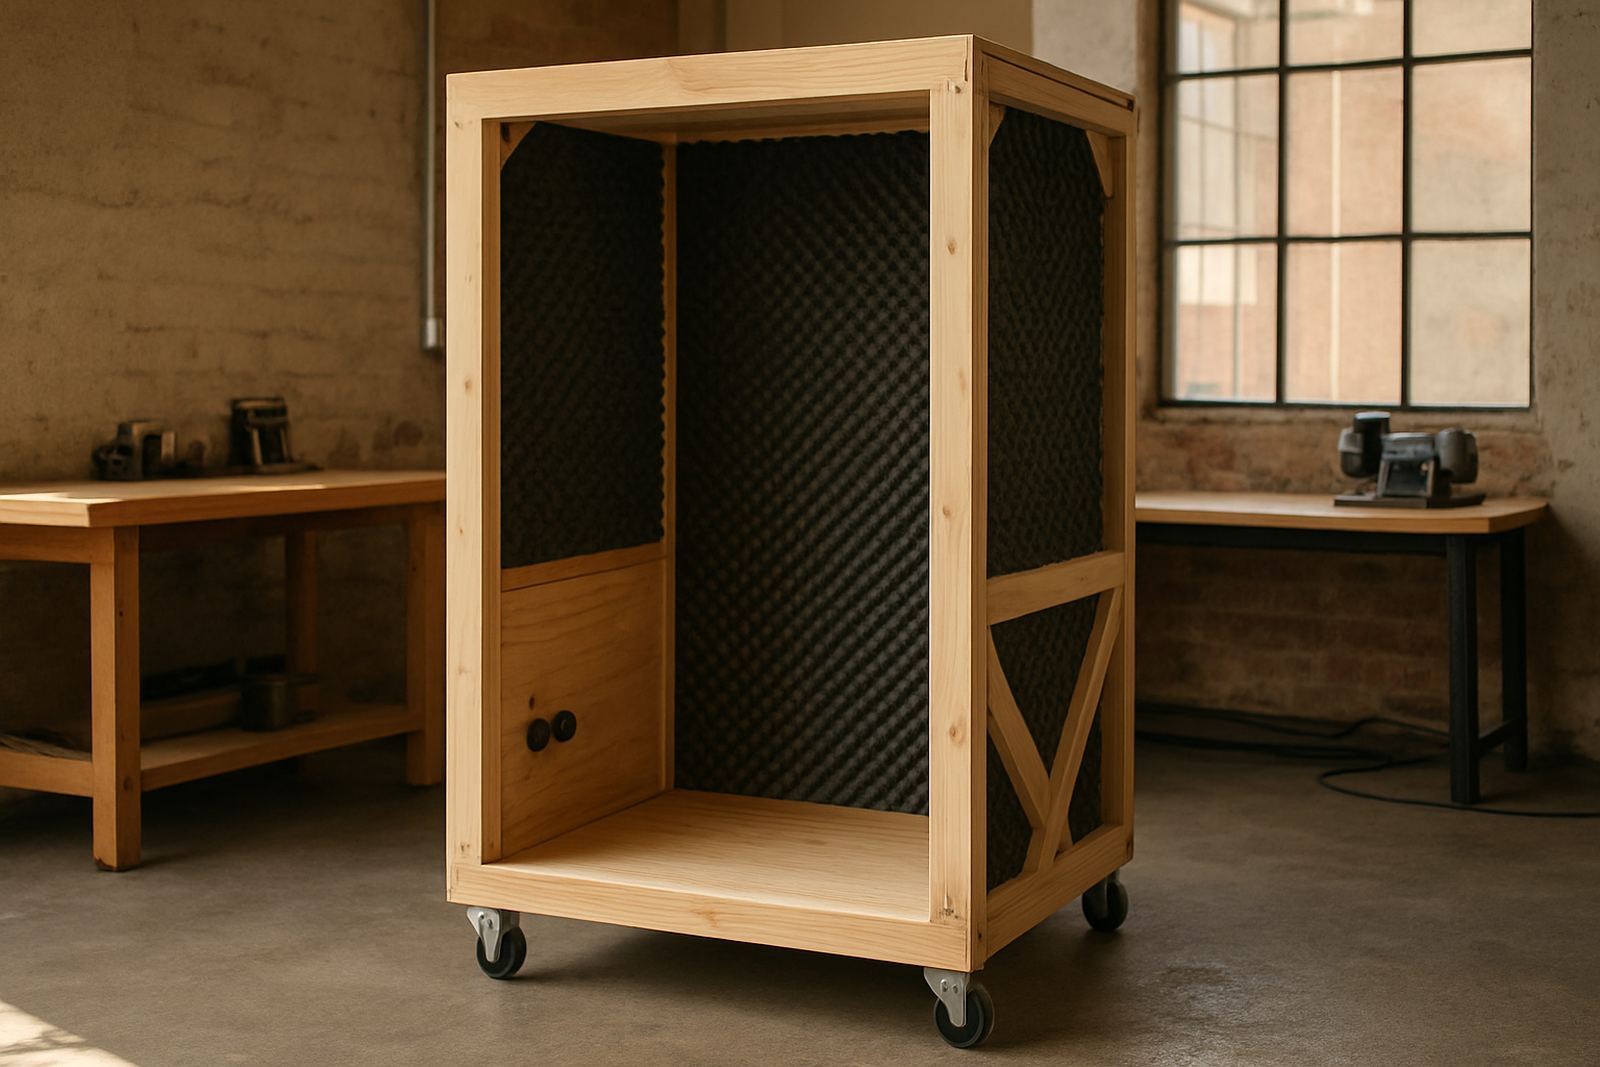
We supplied a starter set of booth materials and workshop-built components sized for the room. The main structure used lightweight framing, solid base panels and acoustic lining selected for spoken word clarity rather than full music isolation. We added a lined inner skin, a sealed door edge, and a small observation panel so the presenter could still see outside the booth without opening the door between takes.
Inside, we fitted a simple table surface for a recorder, a mic stand and a laptop. The booth included cable pass-through points, hook points for headphones and a small shelf for spare batteries, memory cards and cleaning cloths. We also supplied non-slip floor finish, door hardware that would not rattle, and wall-mounted signage so guests knew when recording was in progress.
- Frame: light timber and reinforced panel sections
- Acoustic finish: layered lining for speech recording
- Door: solid core with seals and quiet latch
- Floor: wipeable anti-slip surface
- Extras: cable routing, shelf storage and task lighting
A three week build and handover
The project ran over three weeks from first inspection to handover. Week one was the measure-up and layout finalisation. Week two covered cutting, assembly and off-site preparation of the modular parts. Week three was installation, testing and fine tuning on site. We worked around office hours so the team could keep operating, and only needed short access windows for final fitting and checks.
After installation, we tested the booth with a few mock recordings and adjusted the placement of the table, mic position and lighting. Small changes made a real difference. A slight shift in the mic angle reduced plosives, and moving the shelf away from the mic stand stopped a faint surface buzz. The result was a booth that felt calm and easy to use from the first session.
Results after the first recording sessions
The team reported cleaner voice capture, less room echo and fewer interruptions from the office around them. They could record in shorter blocks and still get usable audio, which made it easier to schedule content around the rest of their work. The compact size also meant the booth did not dominate the room, so the office still functioned normally between sessions.
They particularly valued the fact that the booth did not need a long setup routine. Once the microphones, laptop and headphones were in place, a presenter could walk in, close the door and start within minutes. That kind of speed matters for small teams that work with guests, deadlines and changing scripts.
- Less echo during voice recording
- Faster changeover between sessions
- Cleaner cable management
- Better use of a small office footprint
- Simple daily upkeep with a wipe-down and visual check
What we would do again for a similar booth
If we were building the same kind of booth again, we would keep the same focus on speech-first acoustics, small footprint planning and simple maintenance. We would also start with a slightly more detailed checklist for ventilation and backup power, especially for teams in Johannesburg, Pretoria or Durban where offices are often running through load-shedding or warm afternoons with doors opening and closing all day.
For future booths, we would recommend the same approach to any content team in a shared workspace: measure the room properly, keep the structure modular, and use fittings that can be replaced without dismantling the whole setup. That saves time later and keeps the booth useful as the team grows. It also makes it easier to adapt the space if the client moves offices or needs a second recording point.
For us, this Randburg project was a good example of how workshop methods can solve a very practical content need without unnecessary fuss. Clear measurements, sensible materials and steady finishing made the difference.
Key facts
| Town | Randburg, Johannesburg |
|---|---|
| Project type | Compact podcast recording booth |
| Timeline | 3 weeks from measure-up to handover |
| Booth size | 2.0 m x 1.4 m internal footprint |
| Capacity | 1 to 2 people per session |
| Key features | Acoustic lining, sealed door, cable routing, task lighting, storage shelf |